Image to Pixel Art Converter
Turn any photo or image into pixel art. Pick a pixel size, reduce the color palette, add dithering, and download a crisp PNG — all in your browser, free.
How the image to pixel art converter works
This free image to pixel art converter downsamples your picture into a grid of coloured squares, then optionally quantizes it to a smaller colour set for that classic retro look. Lower pixel widths and fewer colours give a more stylized, chunky result; higher values preserve the source detail so the output stays recognisable at small sizes.
Under the hood the tool does two things. First it resamples the picture using box averaging so each output pixel is a mean of the source pixels it covers — that gets rid of the aliasing you would see from a simple nearest-neighbour resize. Then, if you turned on colour reduction, it runs median-cut quantization to pick the best N colours for your image and remaps every pixel to the nearest one. Both steps happen entirely in the browser using a Web Worker, so nothing is uploaded and nothing is billed.
Dithering for smoother gradients
When you reduce colours aggressively (say, 8–16 total), long gradients start to look banded. Dithering fixes this by scattering neighbouring pixels between two nearby palette colours so your eye reads the transition as smooth. Floyd–Steinberg gives a natural, photograph-style noise pattern and works well for portraits. Ordered dithering uses a fixed Bayer matrix and looks more geometric, closer to what old console games did — great for retro sprites and UI mockups. Leave dithering off if your source image is already flat and cartoonish; adding it there just makes the output noisier.
Choosing a good pixel size
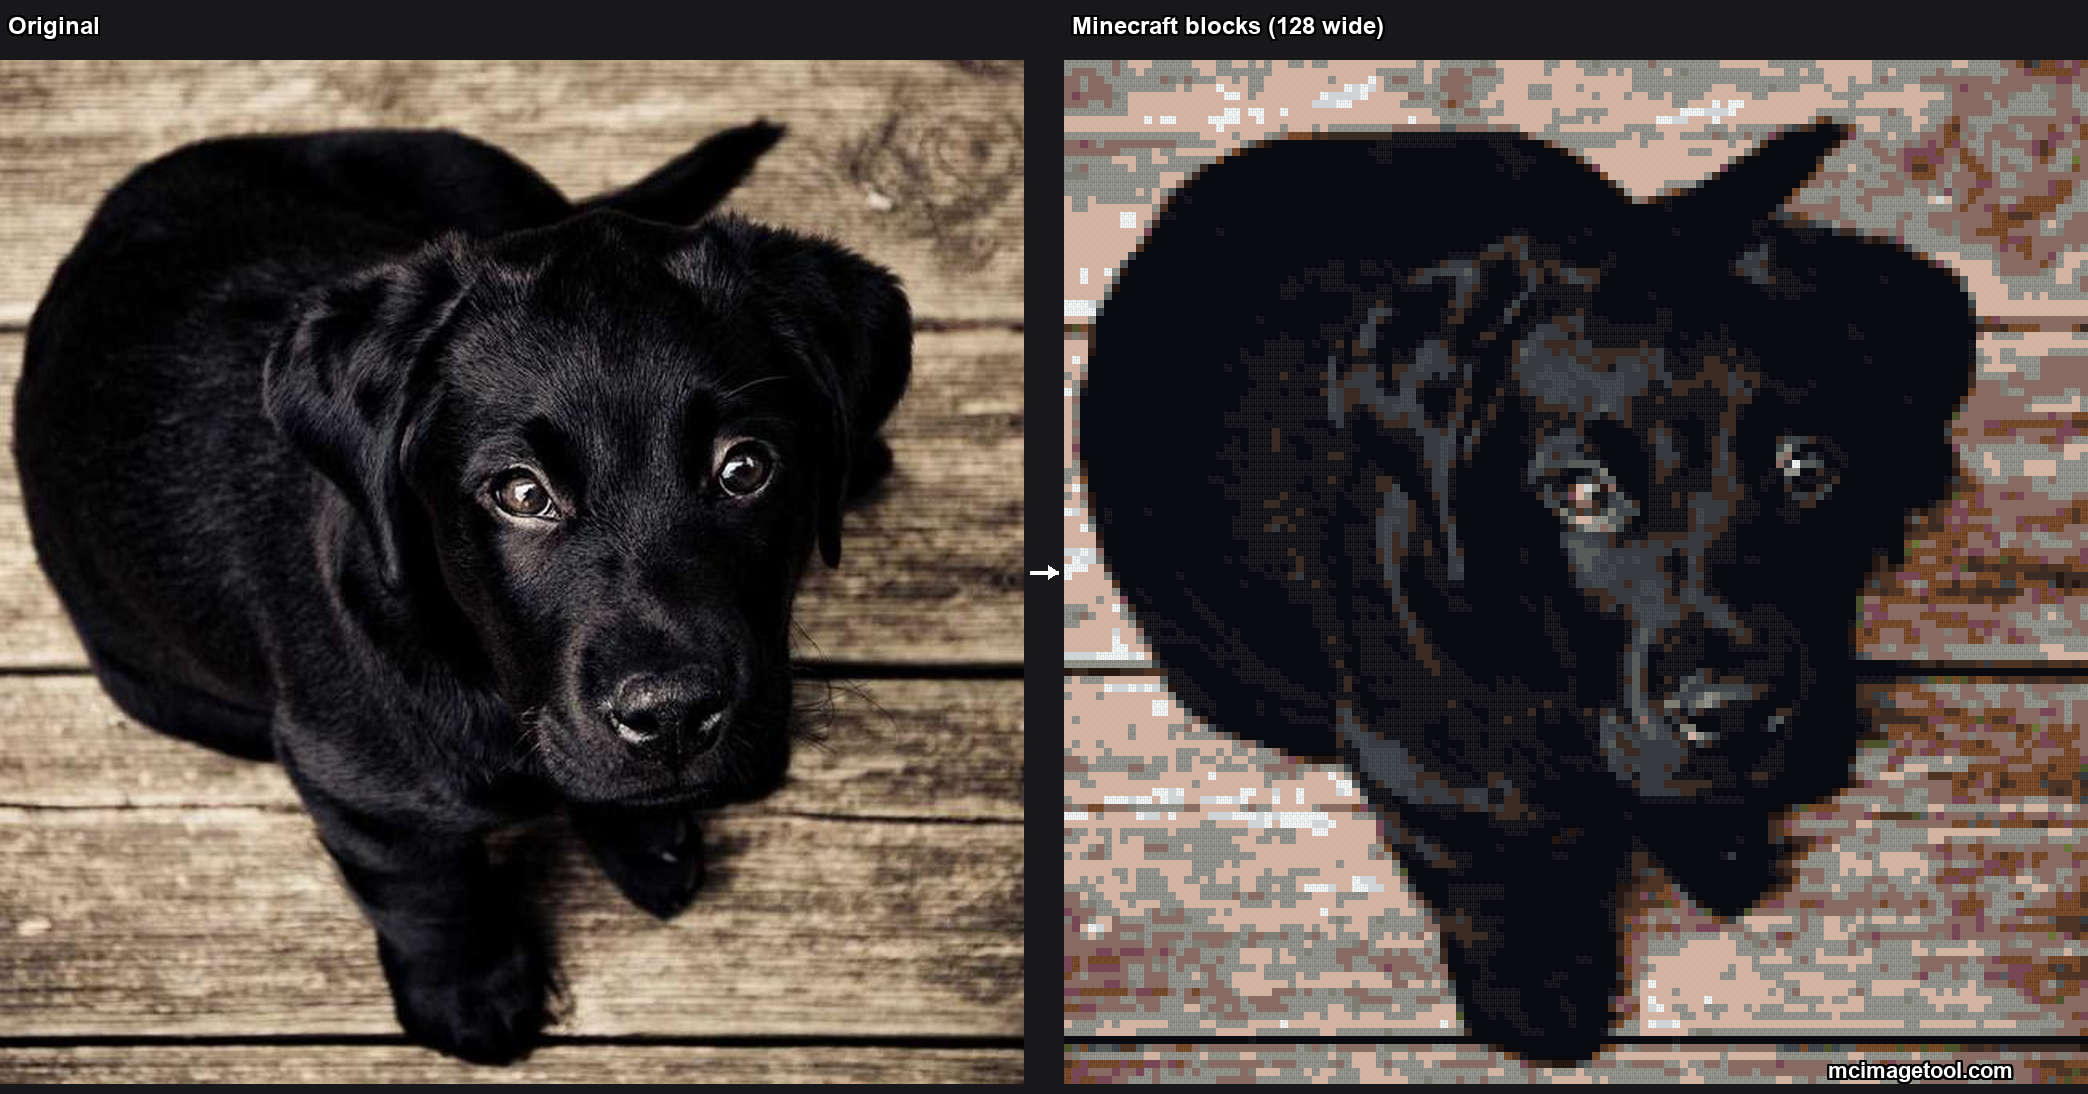
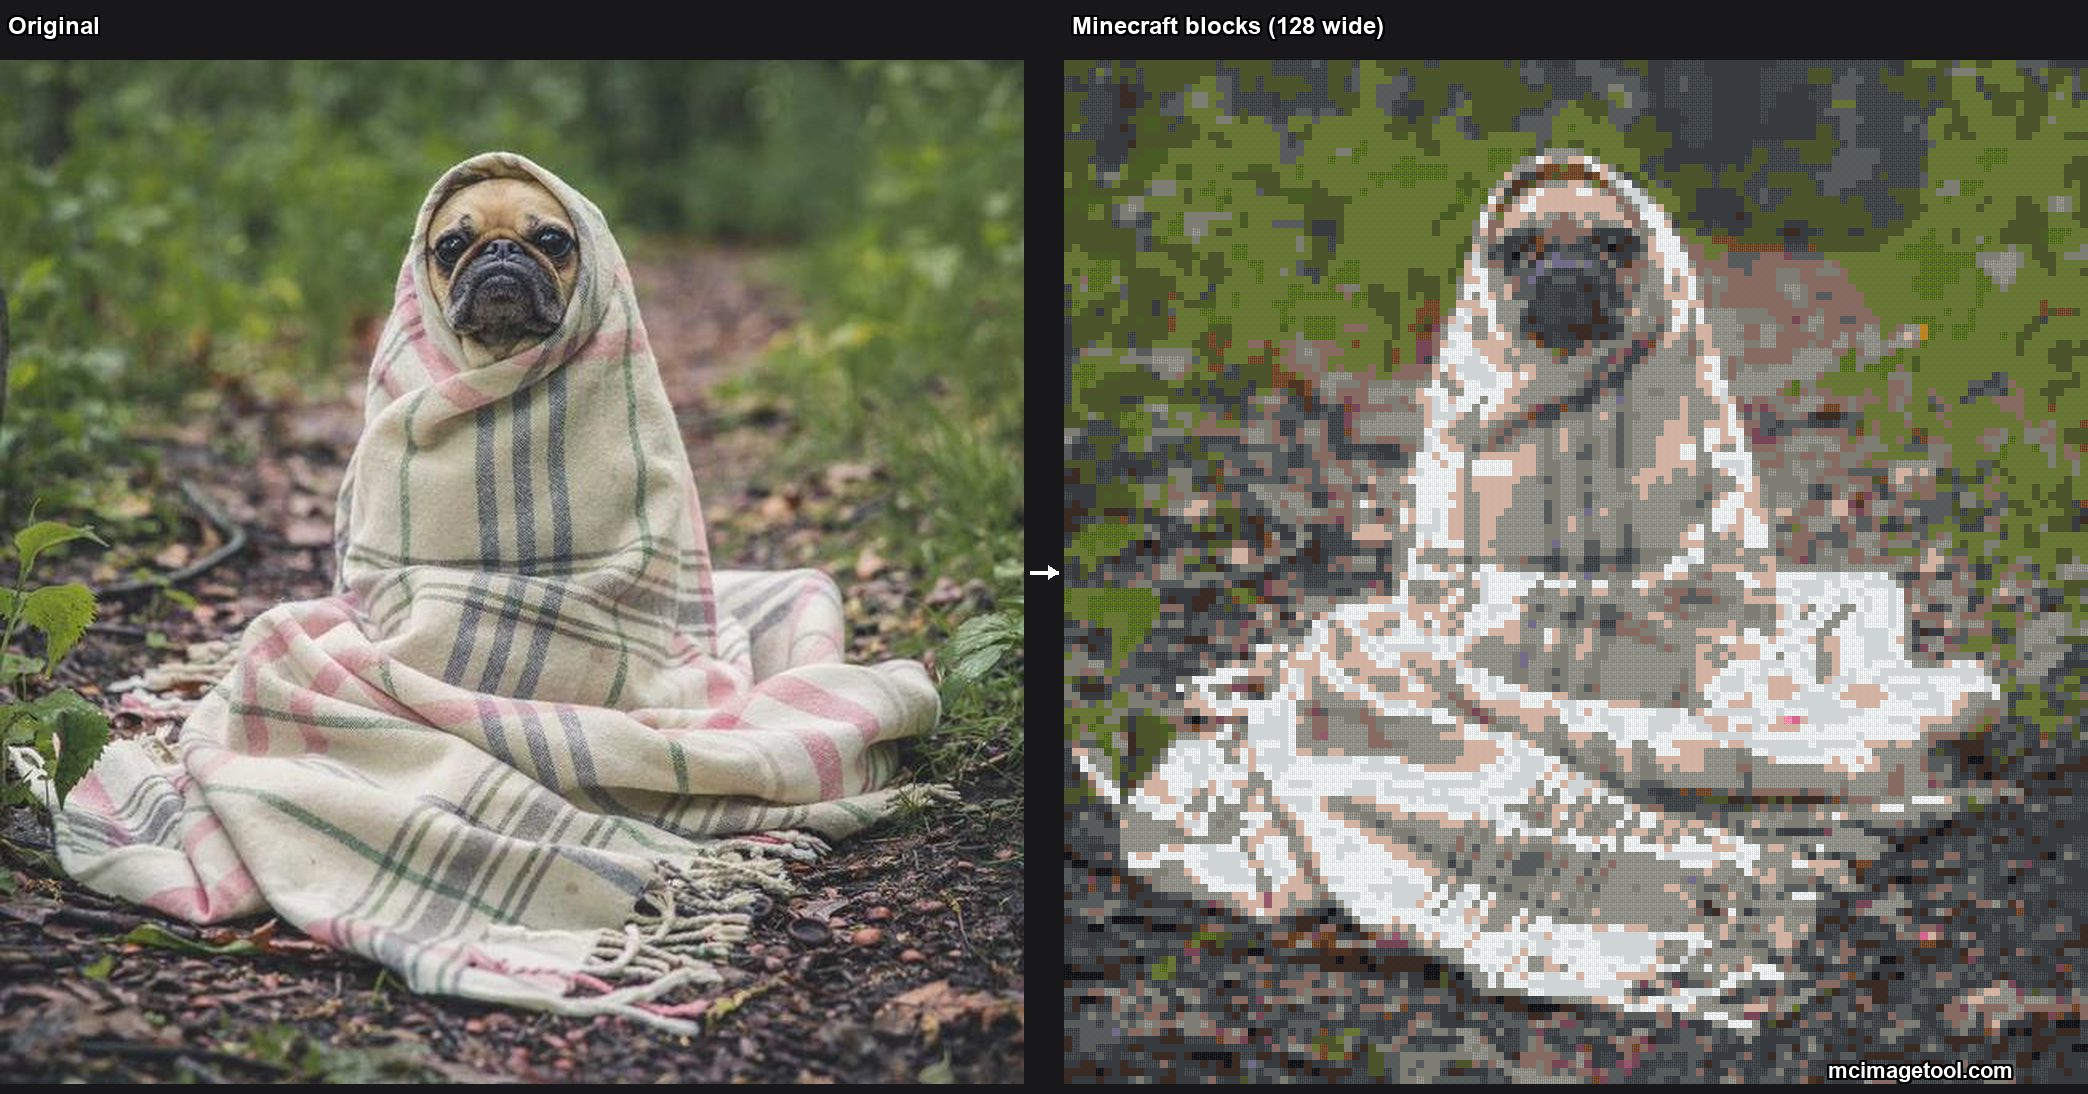
Pixel width is the single biggest lever on the final look. Around 32–48 gives you honest 16-bit sprite territory — chunky, readable, easy to build in Minecraft or Aseprite. 64–96 is the sweet spot for portraits and characters: still stylised, but individual features (eyes, mouth, hands) survive the conversion. 128 and up starts to blur the line between “pixel art” and “downsized image” — the output is highly detailed but loses the visible-pixel charm. For most social-media use, 64 wide is a safe first try.
Common use cases
People use this converter for a handful of very different jobs. Game devs rough-mock sprite sheets from concept art before drawing them properly in Aseprite. Streamers make emotes and profile pics without paying for a designer. Crafters convert photos into patterns for perler beads, cross-stitch and Lego mosaics — the pixel grid maps directly to physical tiles. Miniature painters use tightly quantized outputs as camo reference. And, of course, Minecraft builders — but they usually want the Minecraft-specific version below.
Building in Minecraft?
If you want to build the pixel art out of actual blocks in-game, use the sibling Minecraft pixel art generator instead. That tool maps your image to real Minecraft blocks, gives you a block shopping list with 64-item stack counts, and exports a schematic file (.litematic / .schem / .mcfunction) so Litematica or WorldEdit can place the whole build for you. For map paintings that show up on an in-game map item, see the map art generator. And if you already have a Litematica file and just want a WorldEdit-compatible schematic, use the Litematica to schematic converter.
Tips for cleaner pixel-art output
A few practical habits that reliably improve results. Crop before you convert. The tool downsamples the whole picture; if there is a lot of empty background or an unimportant border, that content still eats pixels in your grid and steals detail from the subject. Cropping to the subject beforehand is the biggest free quality win.
Boost contrast in the source. A photo that looks fine at full resolution can collapse to a muddy blob at 32 pixels wide, because subtle mid-tones get merged. Pushing contrast on the original (in any photo editor, or just a browser filter) before feeding it in preserves shape edges and makes reduced palettes read cleanly.
Reduce colours in steps, not to the extreme. Going from 16.7 million to 8 colours in one jump usually looks harsh. Try 64 first, then 32, then 16 — the sweet spot for most photos is between 16 and 32 colours with Floyd–Steinberg dithering enabled. Very-low palettes (4–8 colours) work best on flat, high-contrast subjects like logos, icons and simple characters.
Use the grid overlay when planning a build. If the pixel art is a stepping stone toward a physical thing — a cross-stitch, a bead-pattern, a mural, a Minecraft build — switch the grid overlay on. It makes counting rows and columns trivial, and printed at any size the grid still lines up with each cell.
Why do it in the browser?
Almost every other online pixel-art tool uploads your file to a server first, which means an unbounded wait, an unknown data retention policy, and — for the tools that use AI — a per-image cost that ends up as ads, watermarks, or usage limits. Doing the conversion client-side with Canvas + Web Workers is fast enough (a couple of seconds even at 256 px) and keeps the file on your machine. If you want a deeper technical overview, the Wikipedia article on pixel art is a good primer on the aesthetics and history.
Examples: image to pixel art conversions
Two real conversions produced by this converter at a 128-block width — one shown in flat-colour output and one mapped to Minecraft blocks for comparison.
Frequently asked questions
How do I turn an image into pixel art?+
Upload your image, choose a pixel width, optionally reduce the color count, and convert. You get a pixelated version you can download as a PNG — at actual size or upscaled.
Is this image to pixel art converter free?+
Yes, completely free with no signup and no watermark. Everything runs in your browser, so your image is never uploaded.
What does the color-count setting do?+
It reduces the image to a limited palette using median-cut quantization — fewer colors give a more retro, stylized pixel-art look. Choose Full color to keep the original palette.
When should I use dithering?+
Turn on dithering (Floyd–Steinberg or Ordered) when you have reduced the palette and want gradients to look smoother. On very flat, cartoonish source images with big colored areas, dithering is usually not necessary.
What size should the pixel width be?+
For social media avatars and small icons, 32–64 px is enough. For posters or wallpapers, try 128–256 px. If in doubt, generate a few sizes and compare — everything runs locally so it costs nothing to experiment.
Can I use this to make Minecraft pixel art?+
Yes — for the Minecraft version, use the sibling Minecraft pixel art generator. It maps your image to real Minecraft blocks and gives you a block list plus schematic export for use with Litematica or WorldEdit.